設定が完了したら、必ずメンテナンスモードを解除してください。メンテナンスモードの解除は、メイン機のファンクションボタンを長押しする方法と、メイン機の設定画面から行う方法の2種類あります。設定画面からメンテナンスモードを解除するには、メイン機の設定画面で以下の手順を行ってください。
1 設定画面で「バックアップ」をクリックします。

A dark rectangular button with a white icon and the text 'バックアップ' (Backup).
2
「フェイルオーバー」の横にある設定アイコン(
 )をクリックします。

A horizontal menu bar. On the left, 'フェイルオーバー' (Failover) with a blue square icon. On the right, a gear icon followed by 'メンテナンスモード(メイン機)' (Maintenance mode (Main unit)).
3 [フェイルオーバーを設定する]をクリックします。
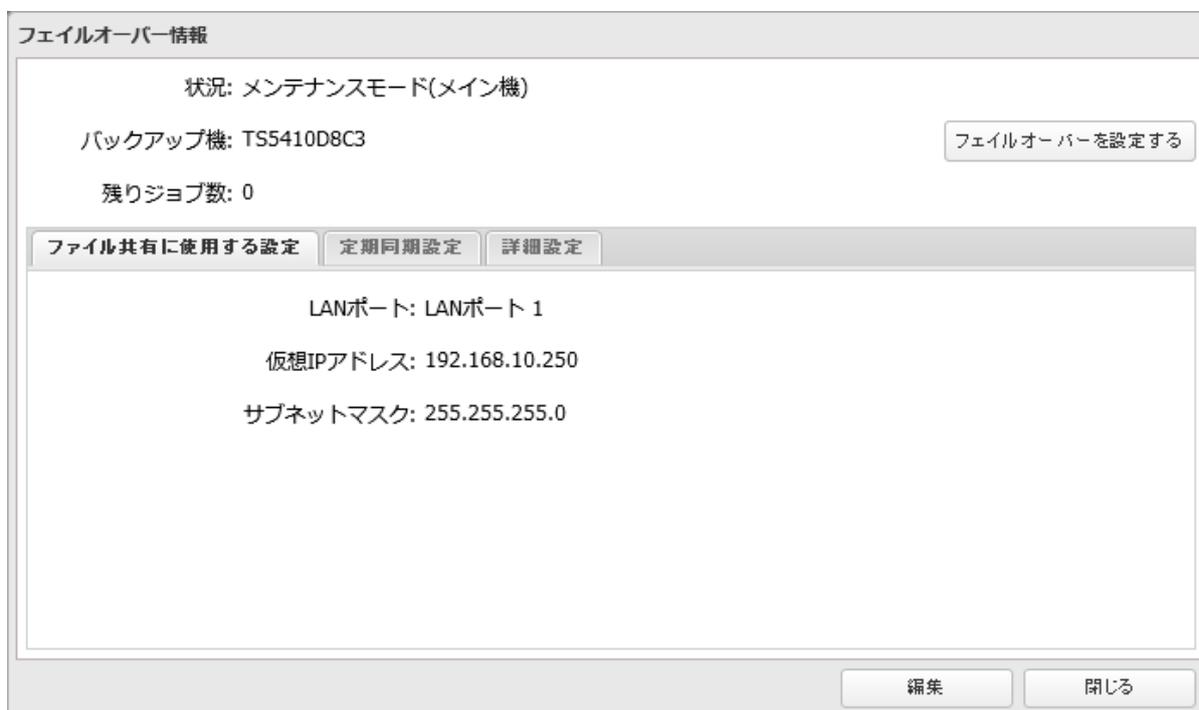
フェイルオーバー情報
状況: メンテナンスモード(メイン機)
バックアップ機: TS5410D8C3
残りジョブ数: 0
フェイルオーバーを設定する
ファイル共有に使用する設定 定期同期設定 詳細設定
LANポート: LANポート 1
仮想IPアドレス: 192.168.10.250
サブネットマスク: 255.255.255.0
編集 閉じる
A 'フェイルオーバー情報' (Failover Information) dialog box. It shows the status as 'メンテナンスモード(メイン機)' (Maintenance mode (Main unit)), backup unit 'TS5410D8C3', and 0 remaining jobs. A button 'フェイルオーバーを設定する' (Set Failover) is on the right. Below are tabs for 'ファイル共有に使用する設定' (Settings for file sharing), '定期同期設定' (Regular synchronization settings), and '詳細設定' (Advanced settings). The active section shows LAN port 'LANポート 1', virtual IP address '192.168.10.250', and subnet mask '255.255.255.0'. At the bottom are '編集' (Edit) and '閉じる' (Close) buttons.