4 液晶ディスプレイ(表示項目、表示自動切替)、明るさ(明るさ、明るさタイマー)を設定し、[OK]をクリックします。
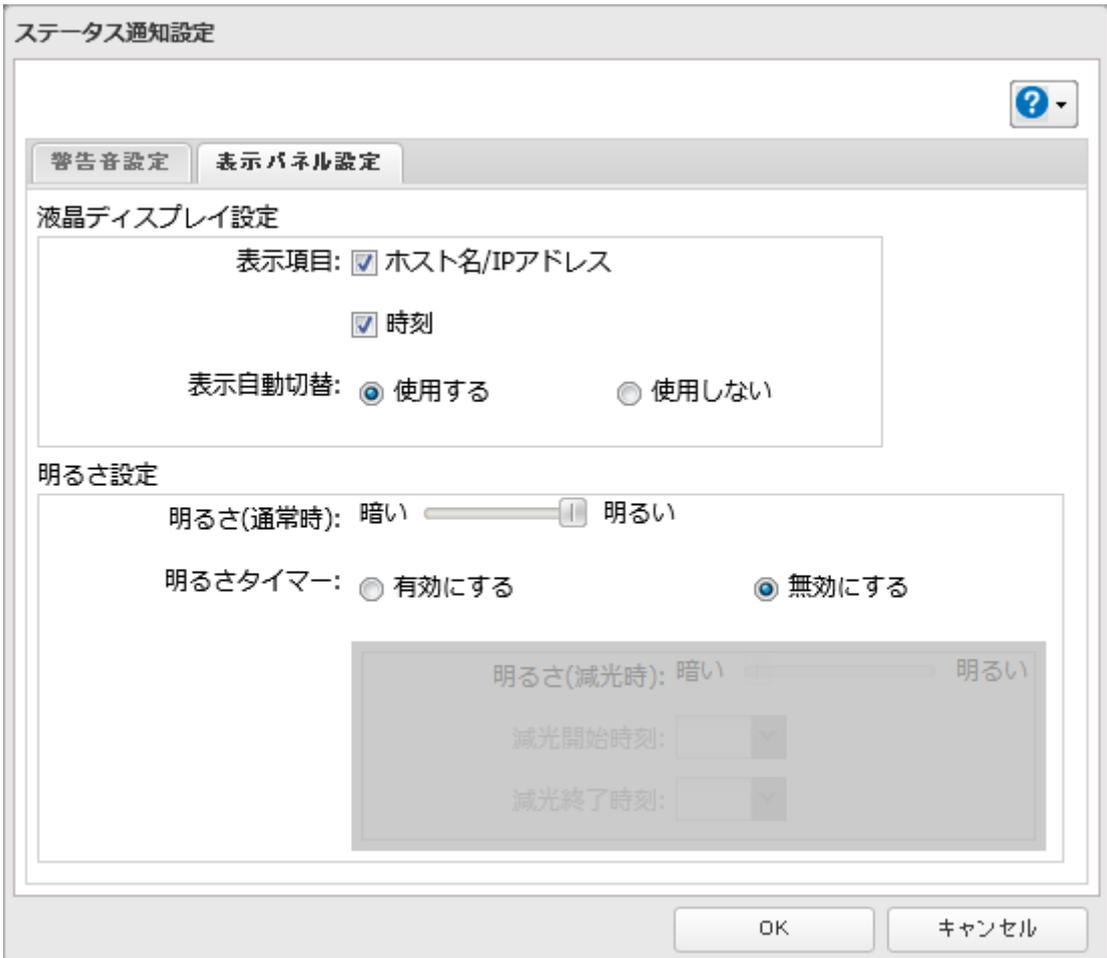
The image shows a 'Status Notification Settings' (ステータス通知設定) dialog box. It has two tabs: 'Warning Sound Settings' (警告音設定) and 'Display Panel Settings' (表示パネル設定), with the latter being active. The 'LCD Display Settings' (液晶ディスプレイ設定) section includes 'Display Items' (表示項目) with checkboxes for 'Hostname/IP Address' (ホスト名/IPアドレス) and 'Time' (時刻), both of which are checked. Below this is 'Display Auto Switch' (表示自動切替) with radio buttons for 'Use' (使用する) and 'Not Use' (使用しない), where 'Use' is selected. The 'Brightness Settings' (明るさ設定) section features a slider for 'Brightness (Normal Time)' (明るさ(通常時)) ranging from 'Dark' (暗い) to 'Bright' (明るい), set at a medium level. Below the slider is 'Brightness Timer' (明るさタイマー) with radio buttons for 'Enable' (有効にする) and 'Disable' (無効にする), with 'Disable' selected. A grayed-out sub-panel shows 'Brightness (Dim Time)' (明るさ(減光時)) settings, including a slider and time dropdowns for 'Dim Start Time' (減光開始時刻) and 'Dim End Time' (減光終了時刻). At the bottom are 'OK' and 'Cancel' (キャンセル) buttons.
以上で、パネル設定を変更する手順は完了です。